
One-Time Passwords (OTPs) are unique codes that are generated for one-time use and are widely used in various industries to verify a user’s identity. Usual OTP use cases include two-factor authentication (2FA) and password resets, but OTPs can also be used in marketing to verify a subscriber’s email address upon, for example, newsletter signup, event registration, or coupon redemption.
In this article, we will walk through a very simple use case, where a subscriber enters a CloudPage, provides their email address and receives an email with a one-time password. They then type in the OTP into a form on the CloudPage, and upon submission, the OTP is verified against a Data Extension and a status message is displayed.
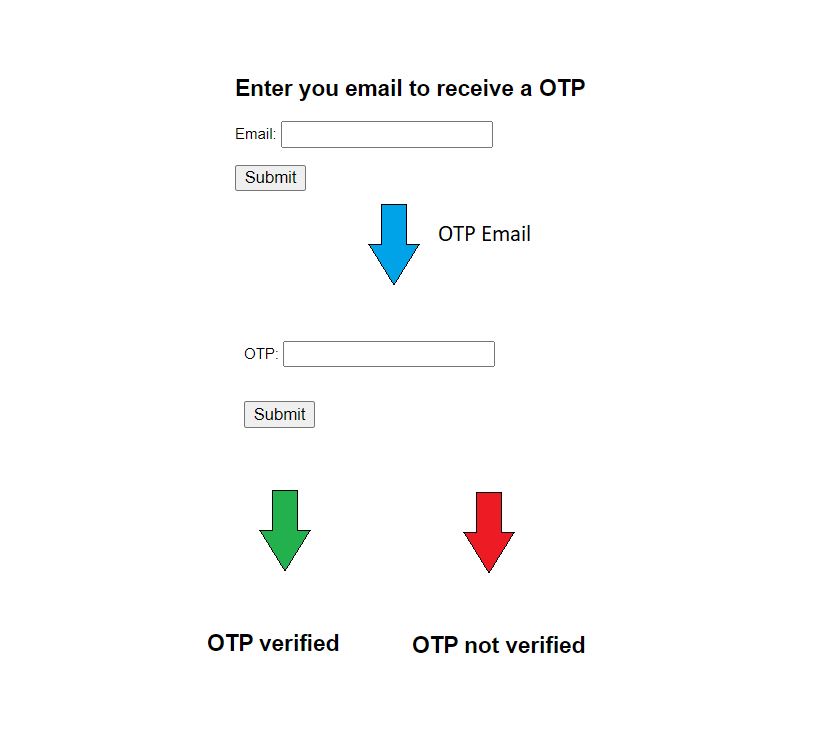
You can try it out yourself here.
To build this flow, you will need to create a CloudPage and an email, and configure a Triggered Send and a Triggered Send Data Extension.
If you are new to Triggered Sends, take a look at this article first to understand all the ins and outs: Introduction to Triggered Sends.
Create the OTP Email
The OTP email will be very straightforward – you can use any email template with the content required for your use case, just make sure to include a function in the email body that will display the OTP: %%=v(AttributeValue("OTP"))=%%
Create the Triggered Send Data Extension
We will use the Triggered Send Data Extension to track who received the email and to store the OTPs. To create the Triggered Send DE, navigate to Data Extensions and click on Create. Then, for Creation Method, choose Create from Template and pick the TriggeredSendDataExtension from the list. You will need the below four attributes, but you’re welcome to add any additional ones if they are required for your use case:
| Name | Data Type | Default Value | Length | Nullable |
|---|---|---|---|---|
| SubscriberKey | Text | 254 | No | |
| EmailAddress | 254 | No | ||
| OTP | Number | Yes | ||
| SentDate | Date | Current date | No |
Create the Triggered Send Definition
We can now go ahead and create the Triggered Send Definition. Navigate to Email Studio > Interactions > Triggered Emails and create a new Triggered Send. Make sure to use the Email and the Triggered Send Data Extension created in the previous steps and don’t forget to Start the Triggered Send once you save it. Note down the External Key of your Triggered Send, as you will need it in the next step.
Create the CloudPage
Let’s now create the CloudPage, which will hold the whole logic related to generating, sending, and verifying the OTP. To make it more compact, I will include the full script on one page, but you can split it into multiple pages if needed. There are a few different elements of the script, so let’s break it down to make it easier to understand.
First, we need to create the initial form, where the subscriber will be submitting their email address:
Now we will add the AMPscript logic which, upon form submission, will generate the OTP and send the OTP Email to our subscriber. OTPs can come in many different forms, but in most cases, they are numerical and consist of 4 to 6 digits. To make it simple, let’s go ahead with a 4-digit OTP. In order to generate it randomly, we will use the Random() AMPscript function with 1000 being the value of the lower bound and 9999 being the value of the upper bound.
We then need to include the script to send the Triggered Email – this is where you need to paste the TS External Key from the previous step. At the end of this part of the script, we will need another form – this form will be displayed once the OTP email is sent and this is where the subscriber types in the OTP:
The last part of our script logic will take the OTP submitted by the subscriber and compare it to the OTP stored in the TS Data Extension. To account for the possibility that the same email can be present in this Data Extension multiple times with different OTPs, we will use the LookupOrderedRows() function to order the records for the same subscriber by date and consider just the latest row. We will then compare the OTP submitted by the subscriber with the one retrieved from the TS DE and depending on whether they match or not, we will display a status message. In your final CloudPage, this is where you can, for example, redirect the subscriber to another page or display gated content.
The full script
Below is the full CloudPage script, and to see it in action, visit the page I created here.
Questions? Comments?
Leave a comment below or email me at zuzanna@sfmarketing.cloud.

Awesome !
Can we do the same using SMS to deliver the OTP ?
Can we configure priority for the SMS so that it reaches immediately with the OTP ?
LikeLike