
DISCLAIMER: The Marketing Cloud App component has been designed for use with externally hosted apps. Use any alternative solutions presented in this article with caution. The settings we are going to use are simplified compared to the ones required by externally hosted apps, so make sure that only designated users have access to the apps you create using this workaround.
A Marketing Cloud app is an externally hosted application that is iframed into Marketing Cloud. Marketing Cloud apps include custom apps built by your organization or apps installed from AppExchange. You launch an app via the Marketing Cloud app menu:
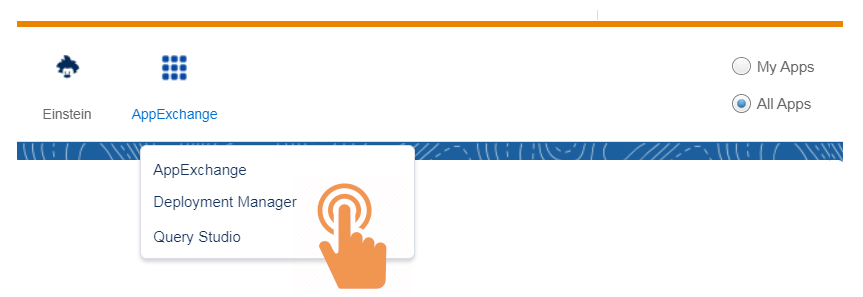
A common Marketing Cloud app you might be familiar with is Query Studio for Salesforce Marketing Cloud:
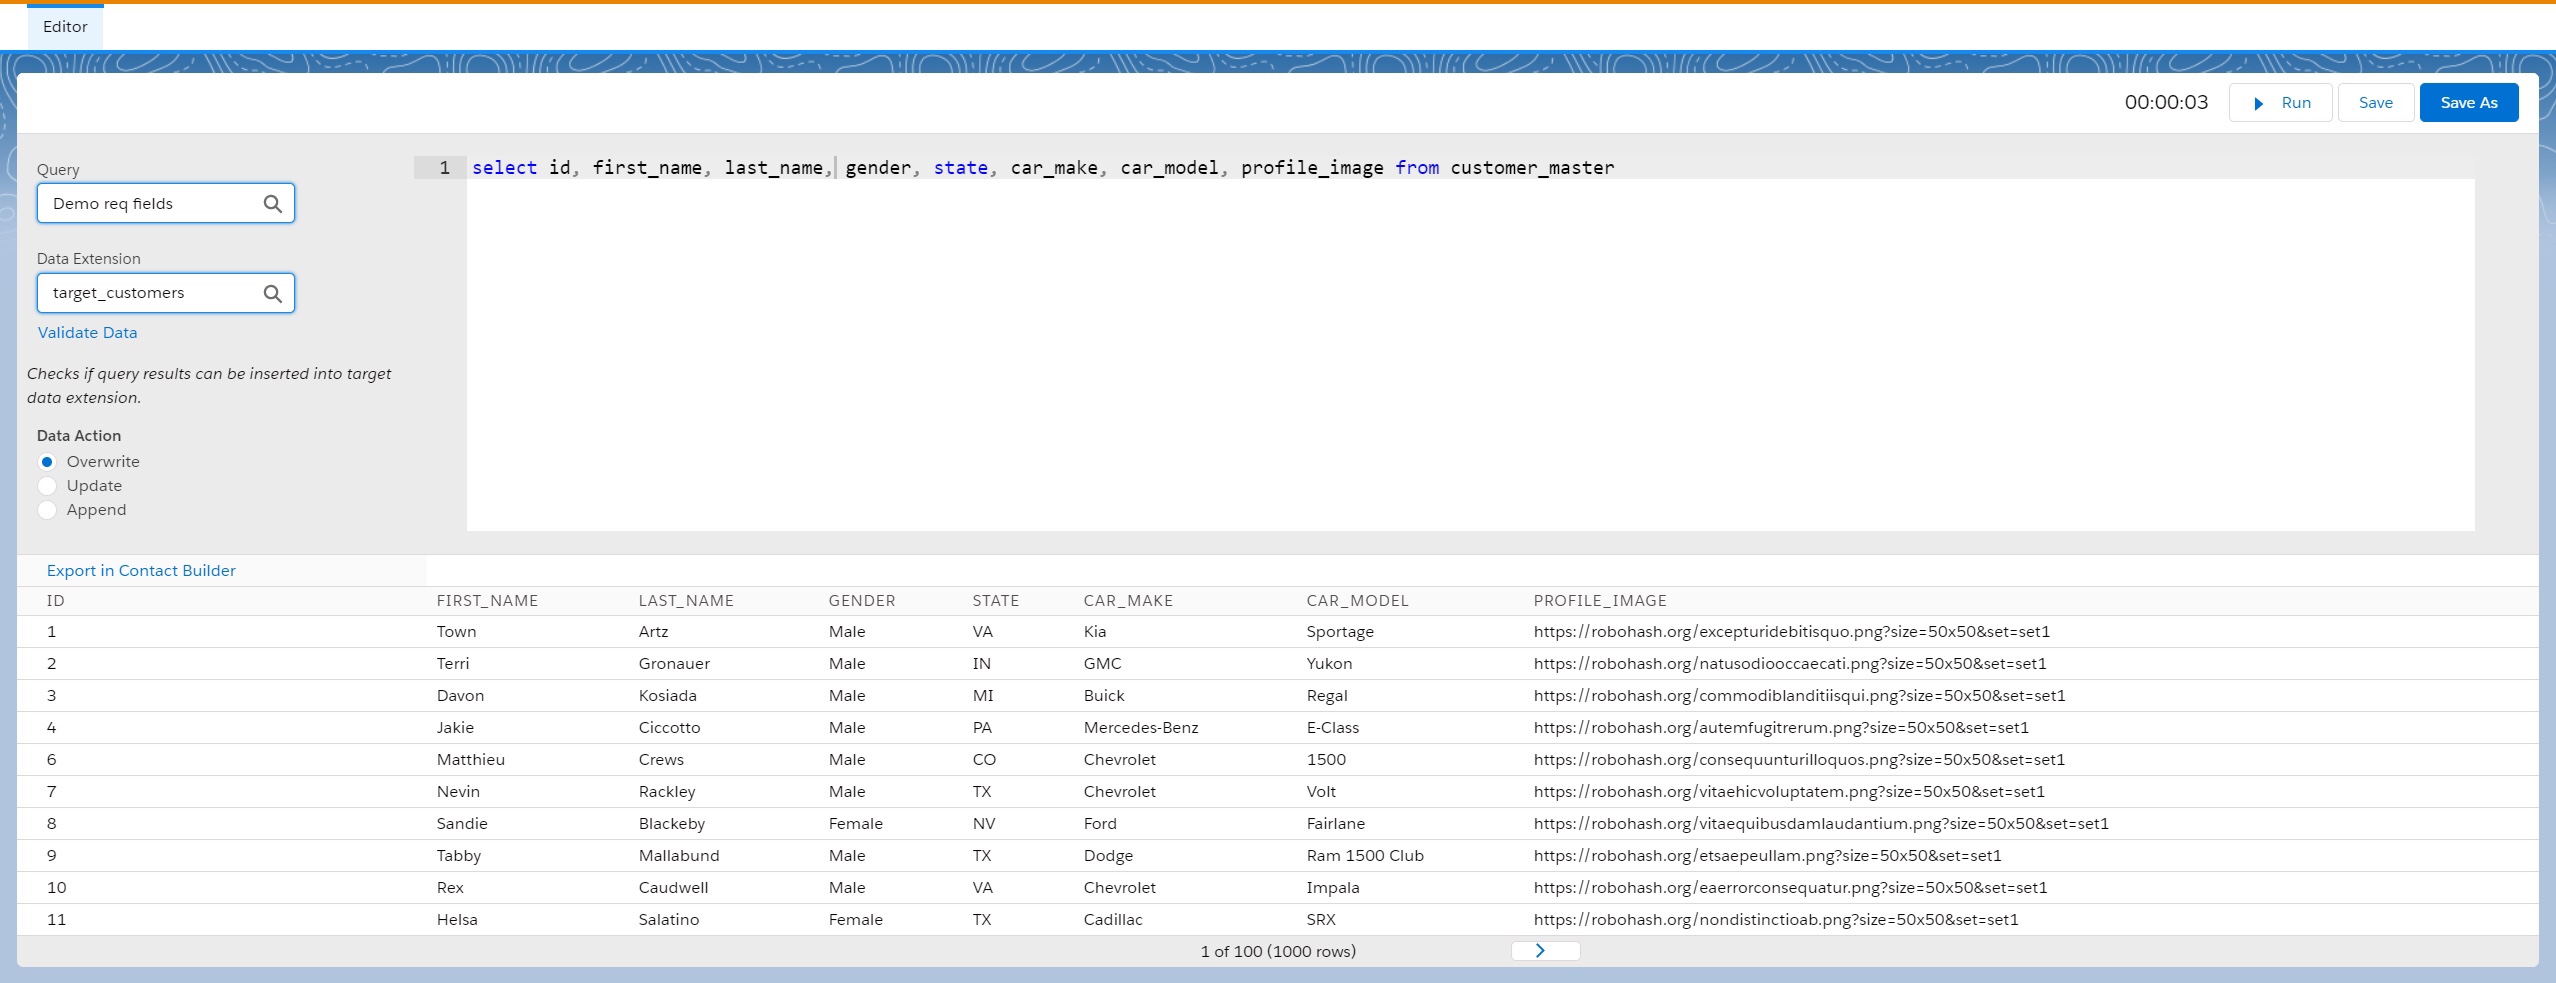
Query Studio is an externally hosted app, which lets you write and run SQL queries and instantly see the query results onscreen, with a similar experience to SQL Server Studio or MySQL workbench.
Another example of a Marketing Cloud app that you might be familiar with is Deployment Manager for Marketing Cloud:
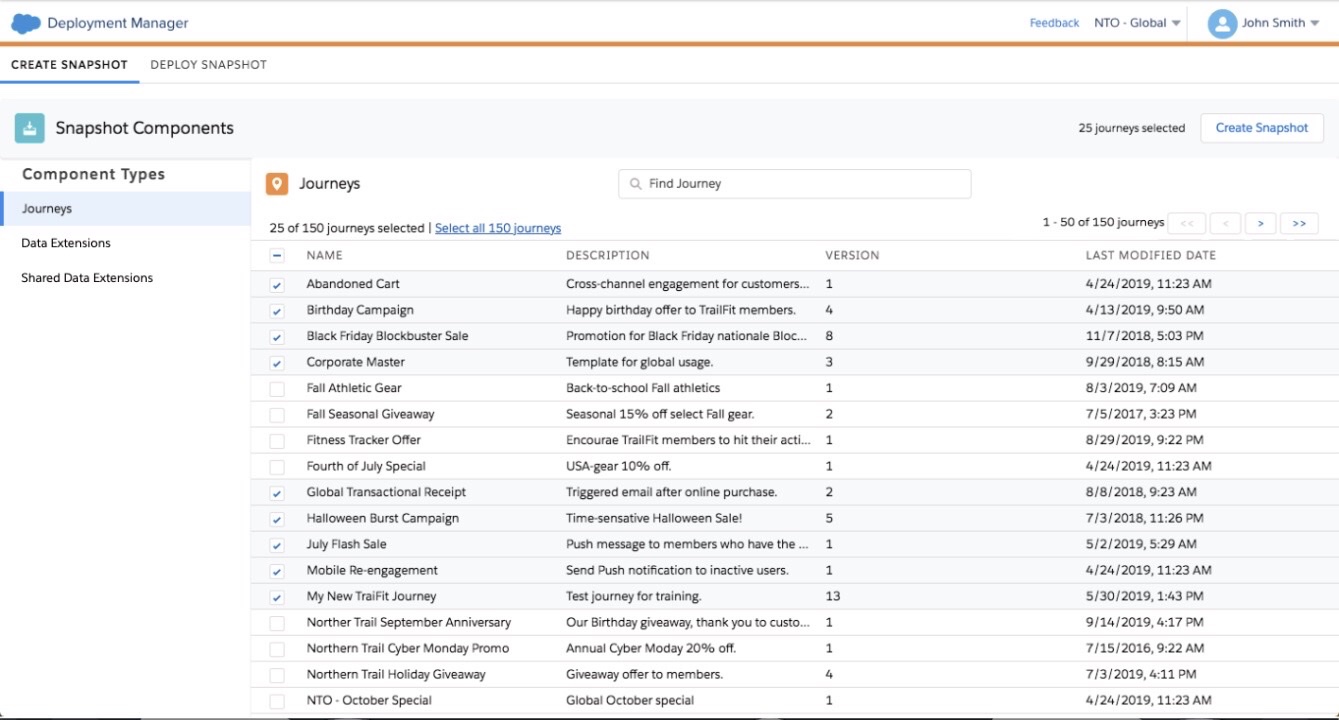
Deployment Manager lets you import and export Marketing Cloud Configuration and easily distribute it to other Marketing Cloud Enterprises and Business Units.
Both those apps, Query Studio and Deployment Manager, have been developed by Salesforce Labs and are publicly available to download for free from AppExchange.
There are many more commercial apps for Marketing Cloud in AppExchange, all of them hosted externally. This means that for security, they all must use a web app or public app OAuth 2.0 integration to acquire an access token, and use that access token to request information about the end-user by calling the v2/userinfo REST endpoint.
Here’s a brief overview of creating an externally hosted Marketing Cloud app:
- Create an installed package, or navigate to an existing package.
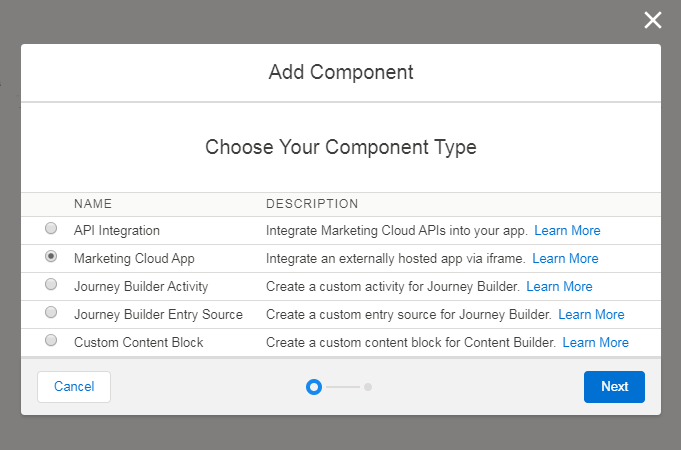
- Under Components, click Add Component.
- Select Marketing Cloud App.
- Enter a name and description for your app.
- Enter your app’s login, redirect, and logout URLs. Point to localhost or test locations first, if needed, and edit these values later. All URLs must be HTTPS (TLS).
- Login – Marketing Cloud uses this endpoint to iframe your externally hosted app. Your app can show anything here. Your app must set a cookie at login. To retrieve information about the end user, ensure that your externally hosted app immediately kicks off Marketing Cloud’s OAuth 2.0 authorization code flow and then calls the v2/userinfo route after calling your login endpoint. Legacy packages only: Marketing Cloud posts the JWT here.
- Logout – Marketing Cloud performs a GET on the logout endpoint from the browser. This logout URL ends the user’s session and unsets the cookie set on login. When the user logs out of Marketing Cloud, the app session also ends.
- Save the component.
- Log out of Marketing Cloud, and log back in to see your app in the AppExchange menu in Marketing Cloud.
Source: Create a Marketing Cloud App
But what if you cannot, or don’t even want to build an elaborate, externally hosted app? If you’re looking for a simple, yet elegant solution that will only be used internally by you and your colleagues, hosting your app in Salesforce Marketing Cloud’s Web Studio might be the workaround that will fulfil your requirements.
My teams have built numerous Marketing Cloud apps that way. To give you some examples of what we used them for:
- monitoring all journeys in the account,
- monitoring all automations in the account,
- creating robust email tracking dashboards,
- creating functionalities to help users get their work done faster and with less manual steps.
Let’s get to it!
Create an app on a CloudPage
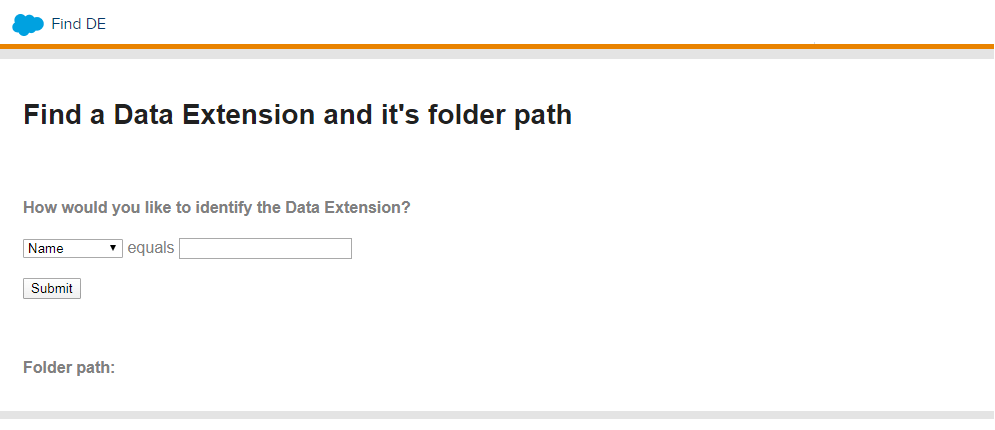
Let’s start by creating a simple app on a CloudPage. We can use an app I already described on this blog in the article called Find a Data Extension and it’s folder path using SSJS. Here is the full script you will need for your CloudPage:
Now you can publish the CloudPage and test if it works correctly before we move on to the next step.
Create a Marketing Cloud App
Let’s now move on to the main Setup and in there to Platform Tools > Installed Packages. On the page with All Packages click on New to add a new package. Give the package a name and describe it’s function (note, that this name and description will only be visible to administrators who have access to setup in Salesforce Marketing Cloud).
In the Components section, click on Add Component and chose a Marketing Cloud App:
Now you will need to Set Marketing Cloud App Properties:
- Name – the name of your app which will be visible for all users
- Description – description of what your app does
- Login Endpoint – the external URL of the CloudPage you created and published earlier, eg. https://pub.s10.exacttarget.com/xzy
- Logout Endpoint – use the same URL as above
Once your app is saved, log out of Marketing Cloud and log back in, to see your app in the main menu, under the AppExchange icon, from where you can launch it:
Access and Sharing
Just like with all enhanced packages, you can license packages installed from parent business units to other business units across your enterprise. On top of that, you can choose which users should be able to access the app and from which BUs. This means that in a few easy clicks, you can either:
- give access to the app to all users in all Business Units,
- choose certain Business Units, where all existing and future users of those BUs would be granted access to the app,
- or pick your designated users and choose in which Business Units they should be able to access the app.
Here’s a step-by-step guide on Licensing for Enhanced Packages:

- From the detailed view for any package, click the Access tab to manage user licensing.
- Search for a business unit to grant or restrict licensing for the package. If you have only one business unit, the search field and tree is hidden.
- License specific users in the selected business unit. When users are added, add licensing for those users here.
- For server-to-server integrations only: To assign licenses to users or to make API requests on behalf of this business unit, enable the package’s server-to-server integration for that business unit. You can assign licenses only if the package contains another component in addition to the server-to-server API integration, which isn’t licensable. Enable Business Units isn’t shown for other integration types.
- License all current and future users in the business unit.
- For server-to-server integrations only: Enable the package’s server-to-server integration for all business units in your account. You can assign licenses to users in all business accounts and make API requests on behalf of all business units in your account. This option isn’t shown for other integration types.
- License all current and future users for all business units in your account. If this option isn’t shown, you don’t have permission to administer installed packages in all business units in your account. To gain access, work with your account administrator.
Make your users feel at home
If the app you’re planning to create will be processing a lot of data or multiple requests that might take some time, you can add a Salesforce-style spinner that your users are familiar with.
Now you’re all set, so have fun with creating your own app!
Questions? Comments?
Leave a comment below or email me at zuzanna@sfmarketing.cloud.

This is so helpful. Thank you for the clear instructions!
LikeLike
Brilliant! Keep up the good work!
LikeLike
Great article, Thanks for sharing!
Just wanted to check with you, when we the cloud page as an app , will this consume cloud page super message? Every time when I look for a data extension?
LikeLike
Hi Naveen – yes, it will, just as it would if you visited the CloudPage itself
LikeLike
Thanks Zuzanna for your quick turnaround!
LikeLike
Hello Naveen,
I found your article very interesting. As a published landingPage, this is also visible from the outside, right? Can you tell me if there is a way to restrict access to cloudPage to MC users only?
Thank you very much and great job.
LikeLike
Thanks for sharing. I have some questions.
1. The cloudpage is public, anyone with the url can access it or there is a way to be accessed only via the mc app?
2. Does it need the config json file, icons, js, require.js, postmonger.js? Could this be used to build a custom activity for journey builder?
3. Since it’s inside the sfmc, does it require any authentication tokens? From the example I assume not, because it’s using the cloudpages features to interact with the data. But if I want to use an API, can it be done through a cloud page?
Thanks,
Paulo
LikeLike
Thank you for interesting article. I have one question here, if we implement cloud page security in a series of cloud pages where there is a form data that needs to be passed on from one cloud page to another then we are missing the form data in the next page as there are multiple redirects. Can anyone suggest a solution ?
LikeLike
Pingback: Publishing a custom sms and whatsapp sending app on SFMC app exchange - Genetrix